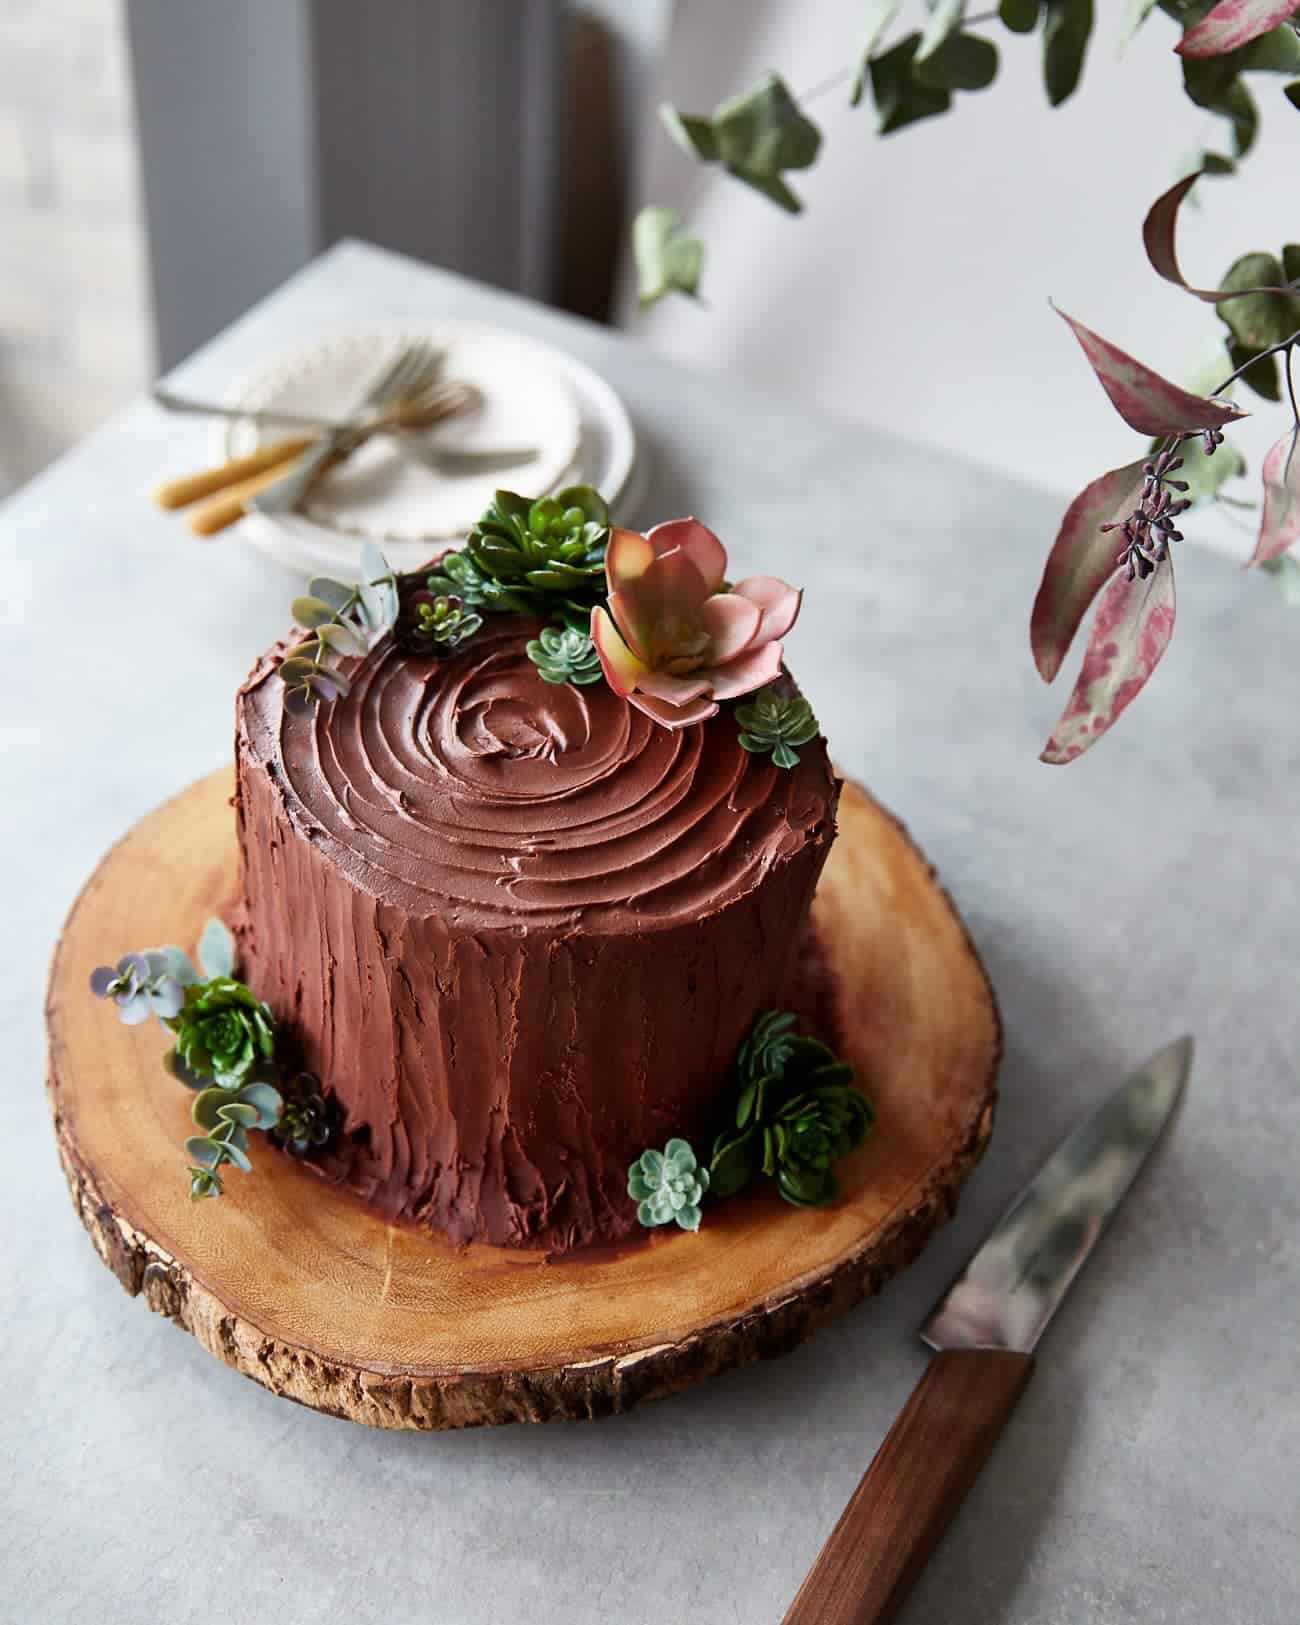
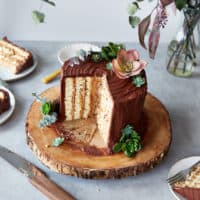
I’m always in charge of Christmas desserts and usually like to make something that’s a bit of a showstopper. I made this vertically layered tree stump-esque yule log a few years ago but, as I actually made it for Christmas day, I didn’t actually post the recipe.
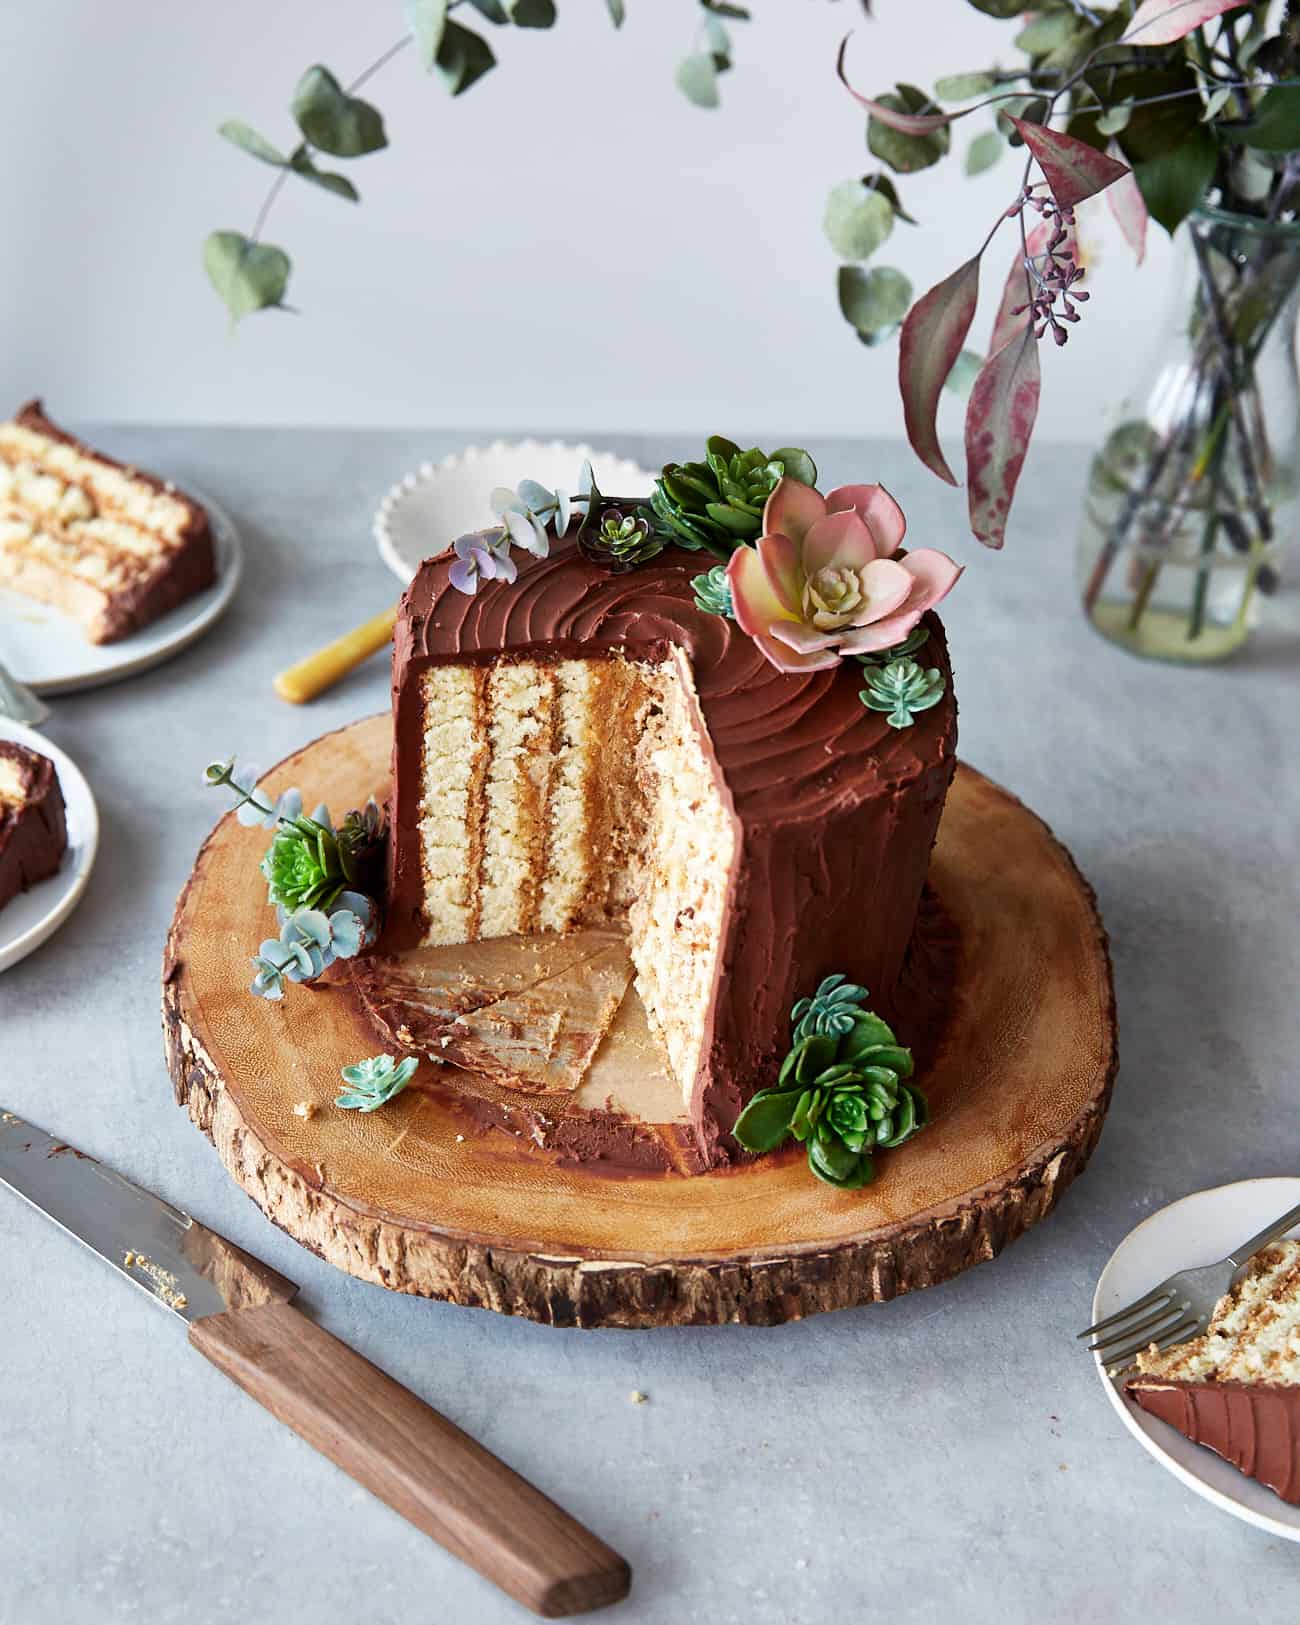
So this year I’ve re-made that very same cake and even filmed some simple videos so you can see how to assemble it. I PROMISE it is not as hard as it seems. I actually think vertical layer cakes are easier and less stressful to make than a standard layer cake. I’ve posted a recipe for a vertical layer carrot cake before and this chocolatey one has a similar process but is actually even easier to make!
Everyone is also baffled by how it is made so it’s a fun one to bring round to a party. You can make it a day ahead and just keep it in the fridge. I decorate mine with plastic succulents I got from Etsy but I really like making decorations out of fondant (just get the pre-made stuff from the super market and make your own succulents/flowers/mushrooms) or even using something like thyme, rosemary or holly leaves to decorate.
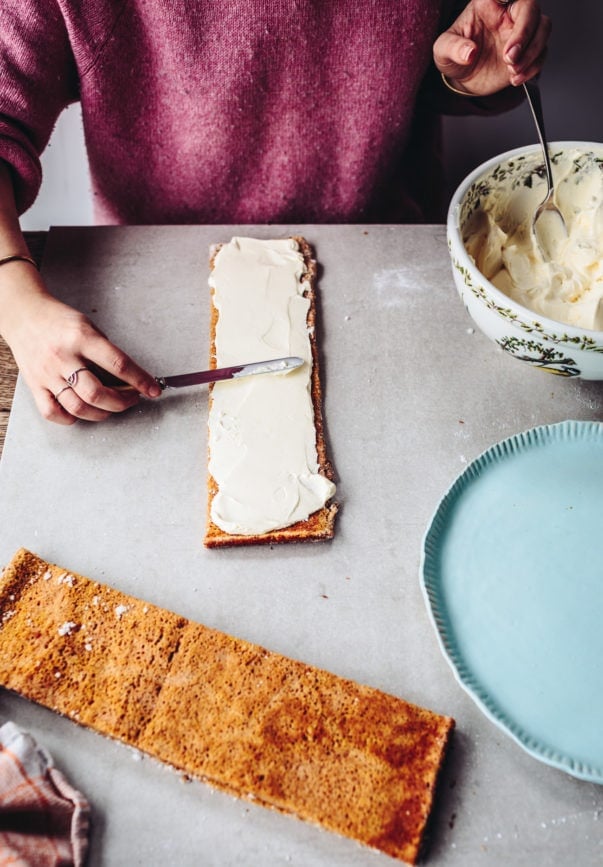
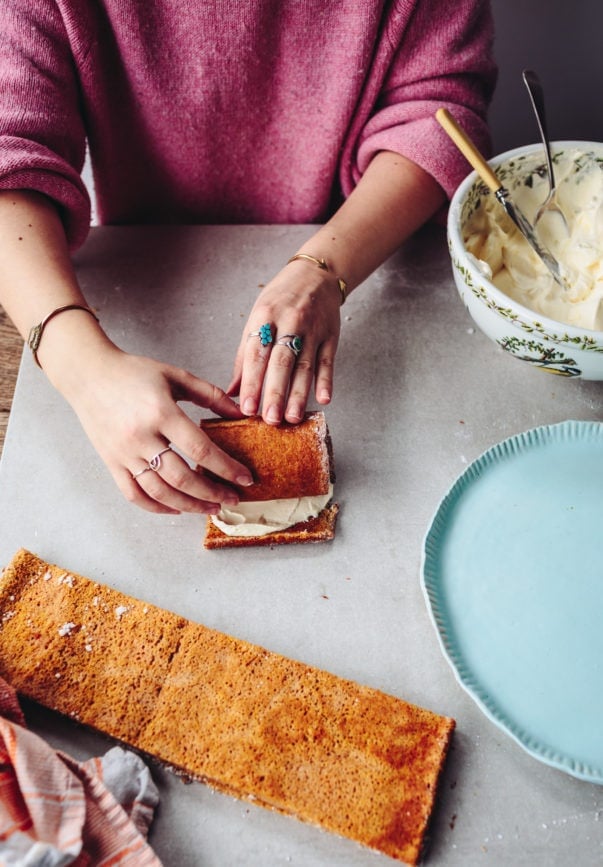
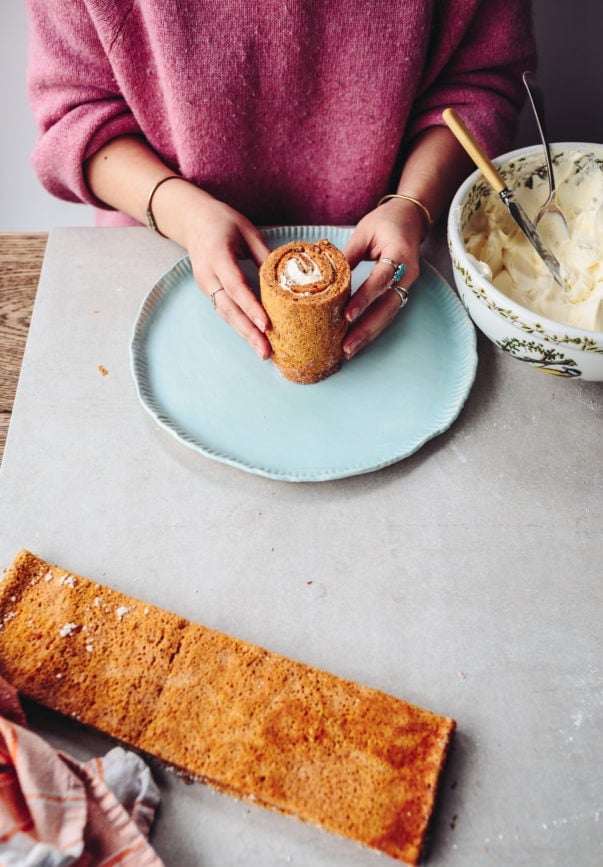
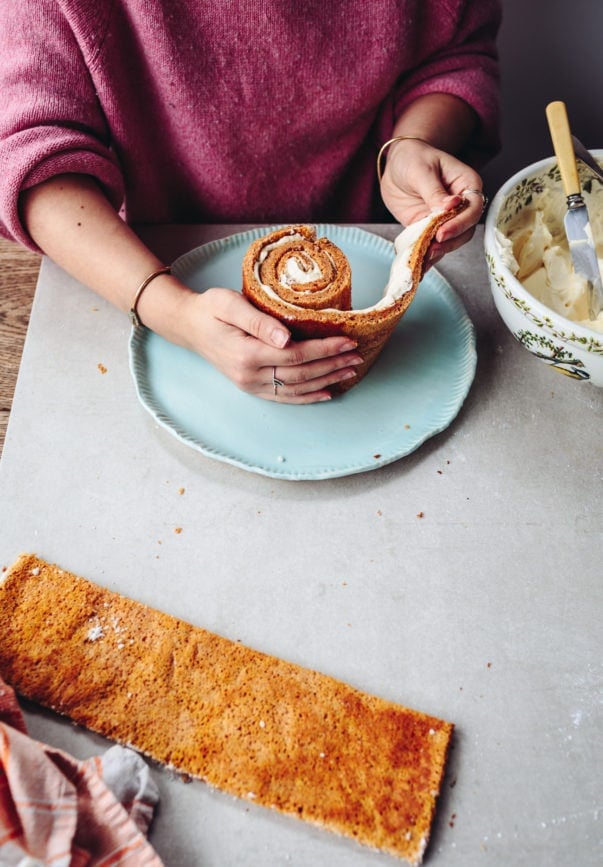
(The images in this grid above are from the vertical carrot cake recipe but they are still helpful here)
Ingredients
Cake:
- 6 medium UK eggs (large US)
- pinch of salt
- 250 g (1 1/3 cups) granulated sugar
- 1 tsp vanilla extract
- 160 g (1 1/3 cups) plain white (all purpose) flour
- 1 1/2 tsp baking powder
- icing sugar/powdered sugar , for dusting
Ganache:
- 150 g (5.3 ounces) dark chocolate (I like a 70% here)
- 300 ml (1 1/4 cups) double cream (heavy cream)
- 2 tbsp icing sugar (powdered sugar)
Coffee cream:
- 2 tsp instant coffee
- 2 tbsp hot water
- 200 ml (3/4 cup + 1 tbsp) double cream (heavy cream) or whipping cream
- 3 tbsp icing sugar (powdered sugar)
Instructions
For the cakes:
- Preheat your oven to 180°C (350°F). Grease and line two 9 x 13-inch (23 x 33cm) deep rimmed baking trays or cake tins with baking paper and then brush the baking paper with a layer of oil too. Set aside.
- Place the eggs and salt in the bowl of a stand mixer fitted with a whisk attachment. Beat on a medium speed whilst gradually streaming in the sugar. Leave to whisk until very thick, pale and fluffy. Beat in the vanilla extract.
- In a small bowl combine the flour and baking powder and stir together with a whisk. Add to the bowl of beaten eggs and fold together gently with a silicone spatula until just combined.
- Divide the batter evenly between the two prepared trays/tins and spread out into an even layer.
- Bake for 15 minutes until golden all over and puffy (don't worry about any large air bubbles on the surface).
- As you wait for the cakes to bake, prepare two clean tea towels by laying them flat on a work surface and dusting them with some powdered sugar all over.
- Flip one of the hot cakes out onto each tea towel, remove the baking paper, and dust the tops of the cake layers with more icing sugar. Starting at the short end, roll each one up with the towel into a tight log. The towel should look like the 'filling' of the cake and prevents it from sticking together when rolled up. Leave to cool completely.
For the ganache:
- Chop the chocolate into smallish pieces (I like a serrated knife for this as it stops the chocolate flying around so much). Scrape it all into a heatproof bowl and set aside.
- Heat the milk in a small pot over a low heat until gently steaming (not boiling/simmering) and then remove from the heat and pour all over the chocolate in the bowl. Allow it to sit for 10-15 minutes to melt the chocolate and then stir together until smooth.
- Taste it and see if you need to stir in the powdered sugar - you might want to if your chocolate is quite dark. Bare in the mind that the cake is pretty sweet so a slightly bitter ganache is a good thing here.
For the coffee cream:
- Combine the instant coffee and hot water in a small bowl, stirring to let it dissolve. Set aside to cool completely.
- Meanwhile whip the double cream/whipping cream in a large bowl with a whisk until you just notice is starting to thicken. Now keep stirring but slow down as you don't want to over-whip it - it needs to be fluffy and gently hold its shape but should not seem 'stiff'. If it does start to get too thick (and even if it starts to become grainy) you can quickly fix this by stirring a little more un-whipped cream into the bowl and very gently stirring it through.
- Gently stir in the cooled coffee and the powdered sugar and set aside.
To assemble (use video + images in the post above for help):
- Very gently un-roll the cooled cakes. Trim the very edges of each cake layer off (eat those scraps!). Re-roll each cake layer the same way but this time without the tea towel. Cut each log in half so you have four logs about 4 inches (10.5cm) long.
- Unroll one of the logs very gently and spread 1/4 of the coffee cream over the surface of it. Re-roll the same way and stand the rolled log up like a tree trunk.
- Unroll a second log of cake, spread on 1/4 of the whipped cream. Starting at the exposed edge of the 'tree trunk', wrap this second strip of cake around it.
- Repeat with the next two cake logs so you end up with a very fat, short roll cake sat upright.
- If your cakes crack/break in the process of doing this, don't worry about it. Just patch it back together with some cream and you really won't notice it!
- Place onto a cake stand and frost the top with around 1/3 of the ganache - the ganache should have cooled to a spreadable consistency by this point. If it's too firm, place over a bain marie briefly to melt some of the ganache and then remove from the heat and beat together with a whisk. If it's too runny still, pop it into the fridge for a few minutes and check on it until you get the right consistency.
- Use an offset spatula to smooth the ganache out to the edges. Then use the spatula to make a spiral pattern on the top of the cake (to look like tree rings). Next, frost the sides with the remaining ganache, smoothing out with an offset spatula before using the spatula to make upward strokes all around the sides to give it a 'bark' texture.
- Chill until ready to serve.
- (for decorations I've used plastic succulents on mine! I also like chopped hazelnuts, meringue 'mushrooms' or fondant 'mushrooms' or even some fresh fruit or edible flowers/greenery (like thyme or rosemary) to decorate).


Loved the recipe… easy to understand,can’t wait to try it! If this goes well, this reversed yule log cake will be my new xmas tradition… 😉
This cake looks incredible! You did an amazing job! I need this in my life!
Paige
http://thehappyflammily.com
Incredible looking cake. Love the decorative elements as well. I may have to give this a shot one of these days. Cheers and Happy Holidays!