How to make sourdough starter
Ingredients
For the flour mix:
- 140 g plain white flour
- 140 g dark rye flour, wholewheat bread flour (or more plain white flour)
For daily feeding:
- 40 g flour mix
- 40 g water
Instructions
Day 1:
- First off, we're going to make the flour mix. In a bowl, combine the white flour and dark rye flour (or wholewheat flour). Mix until fully combined then transfer to a labelled container.140 g plain white flour, 140 g dark rye flour, wholewheat bread flour (or more plain white flour)
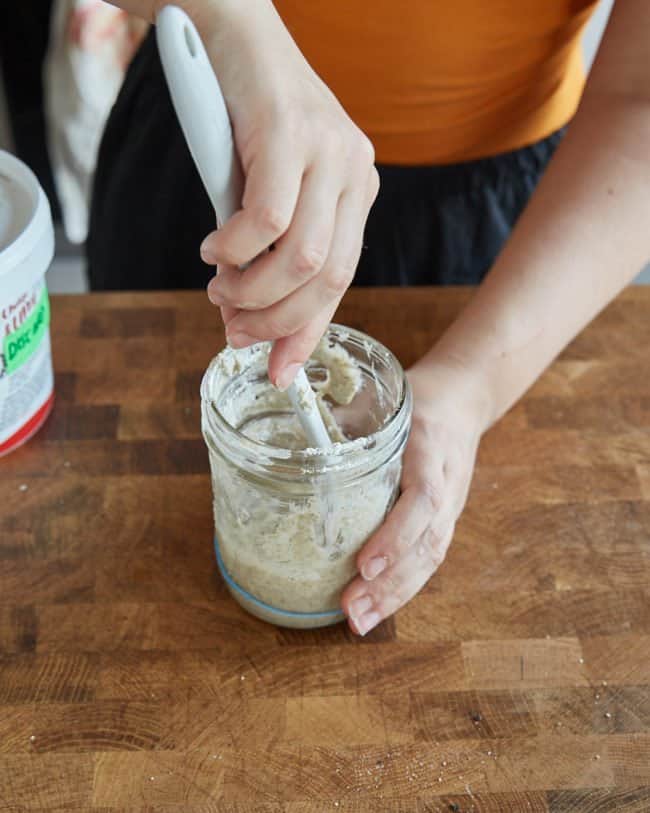
- In a medium, clean, glass jar, place 40g of your flour mix and add 40g of water. Stir together until fully combined (I like to use a small silicone spatula to do this).40 g flour mix, 40 g water
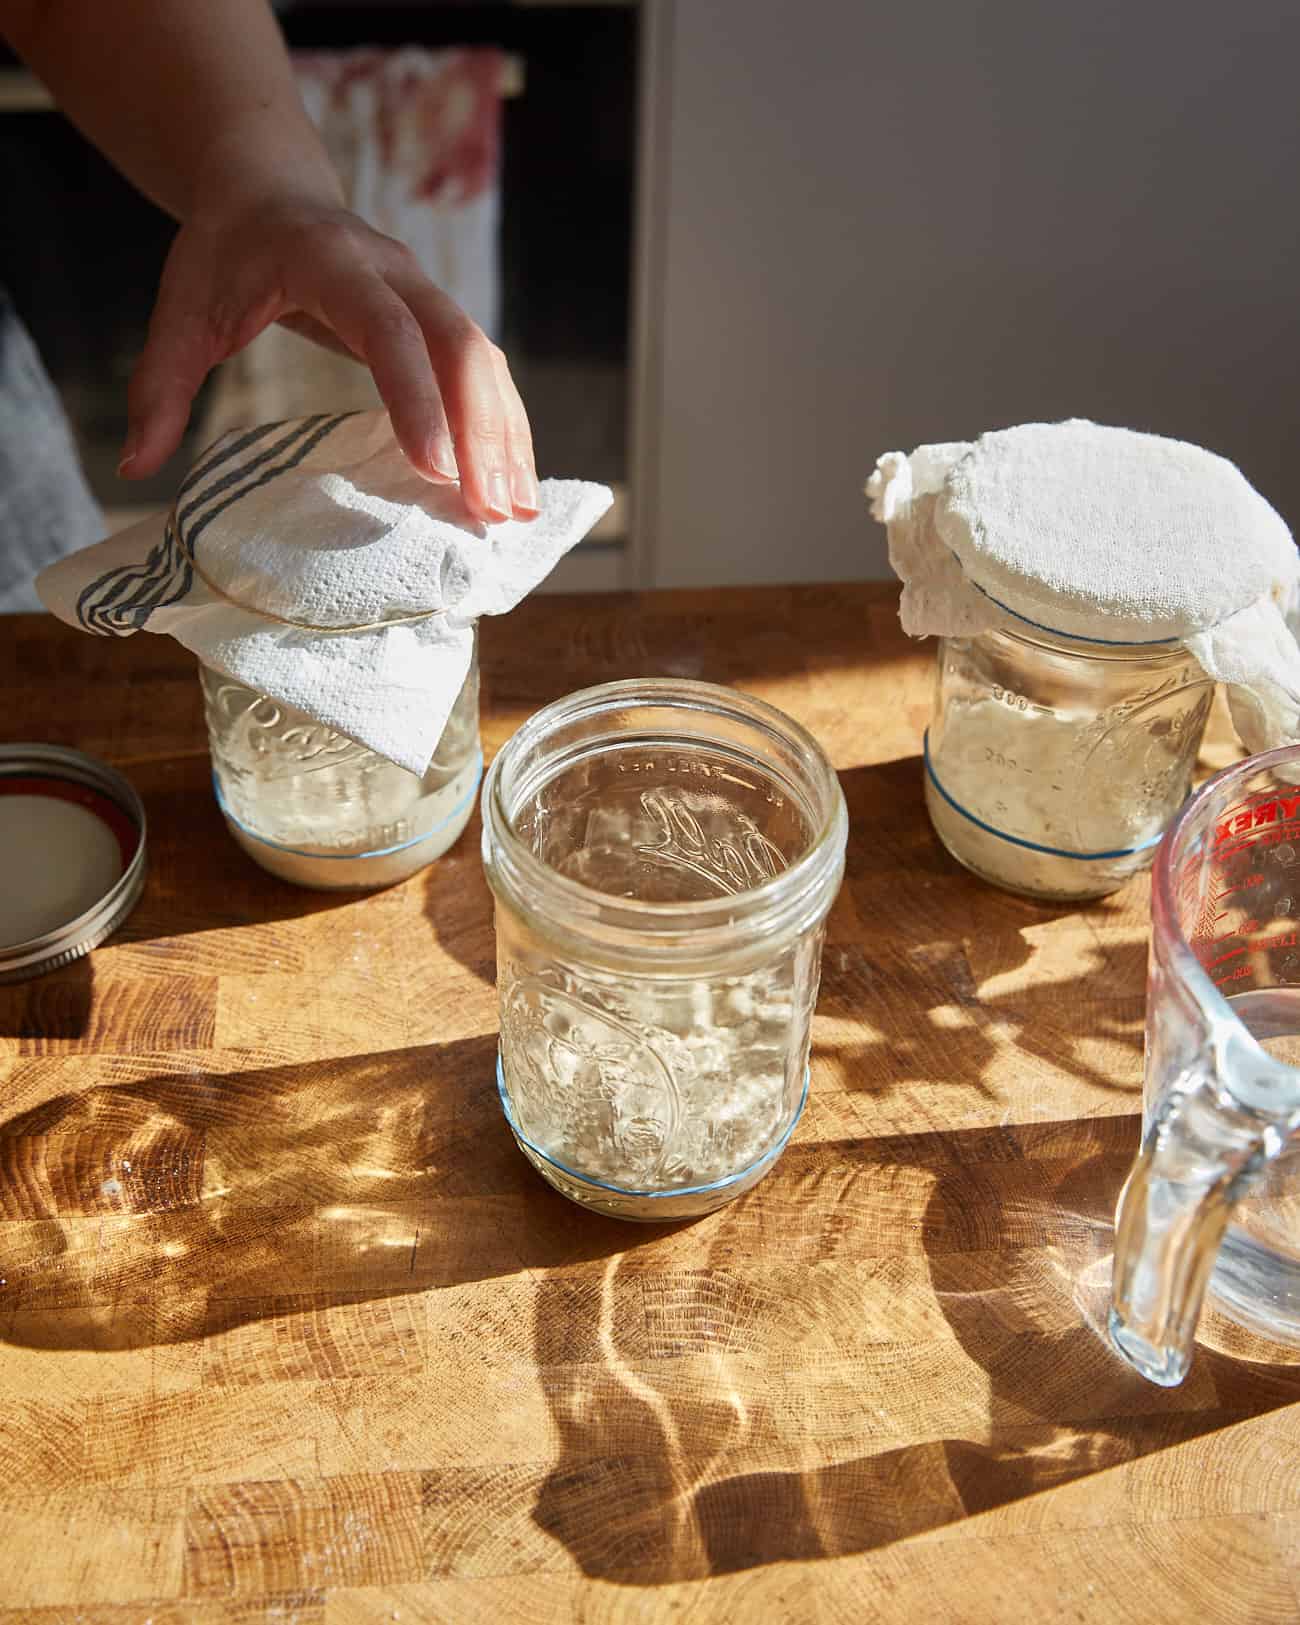
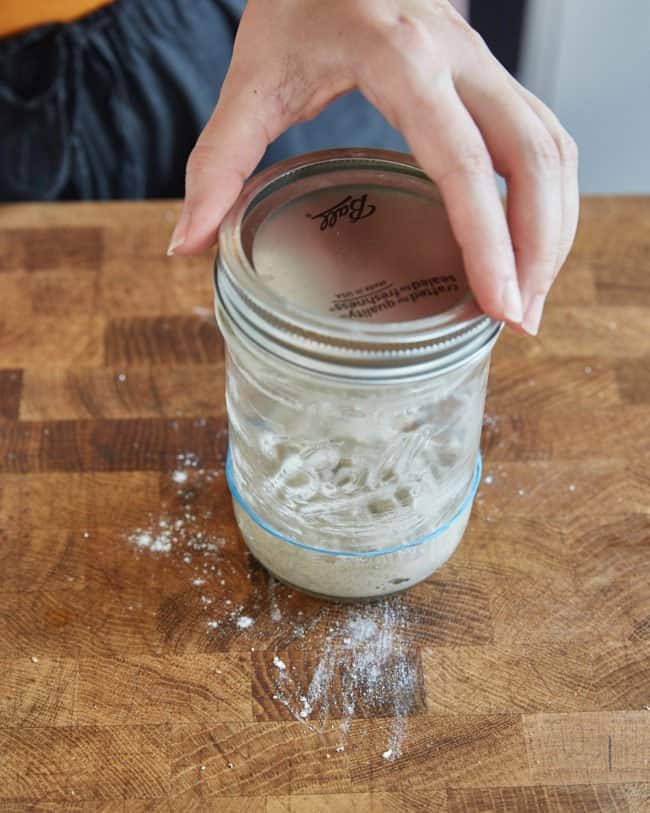
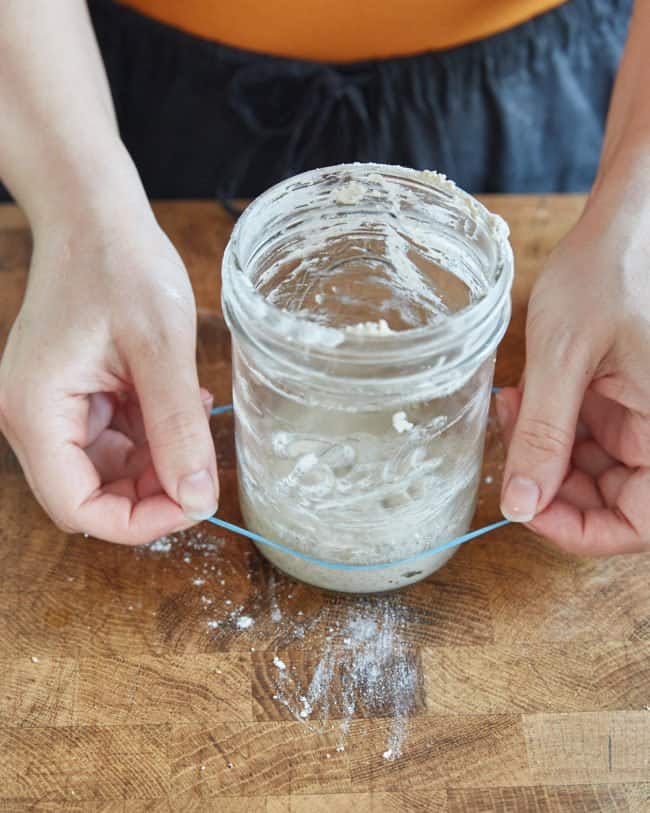
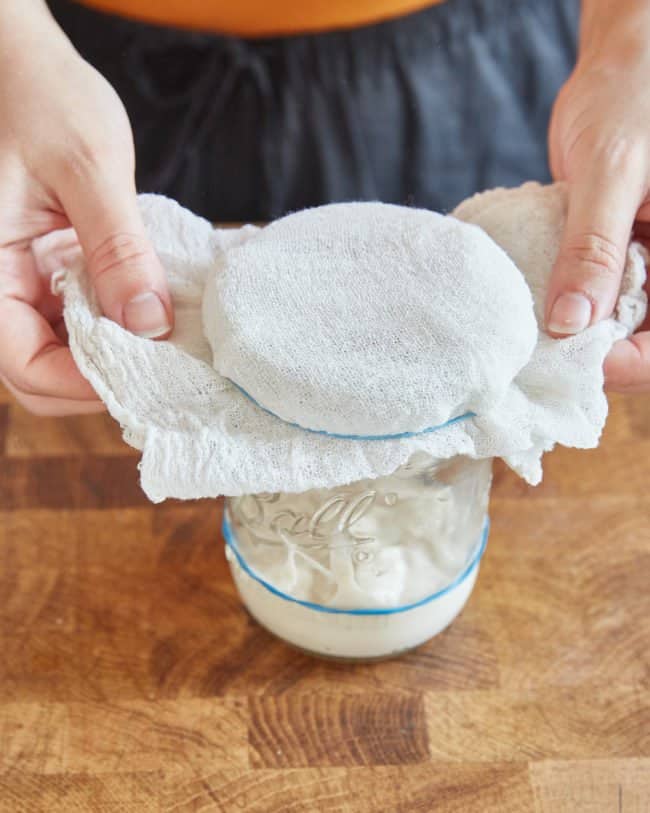
- Cover the jar with a piece of muslin/cheesecloth/kitchen roll, secured with an elastic band. Alternatively, cover with the lid of the jar, placing it into the jar instead of screwing it on.
Day 2-7:
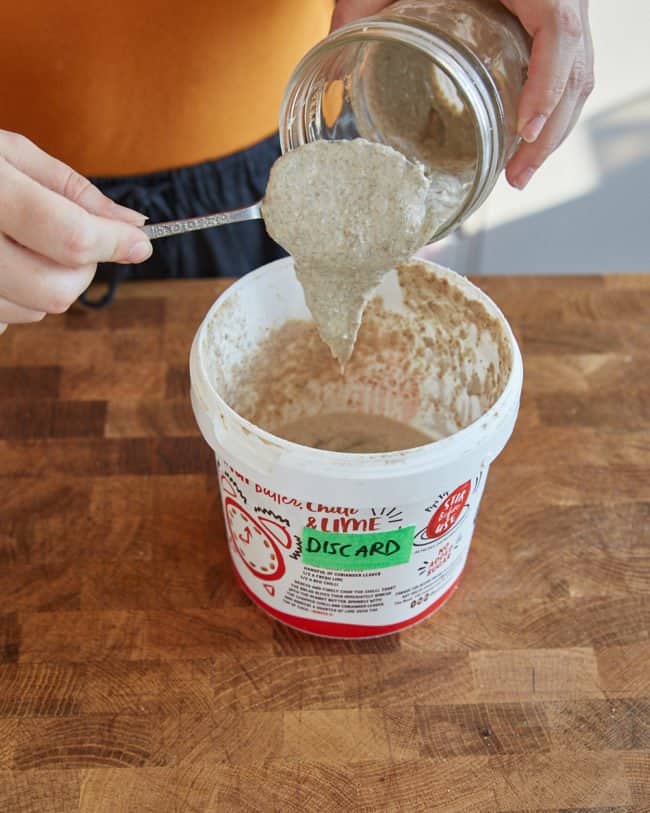
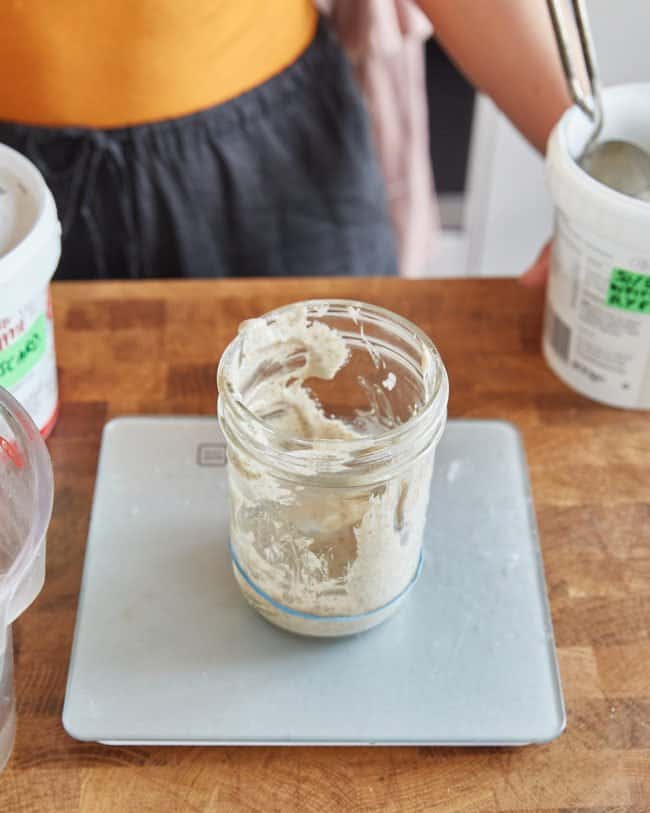
- Each day, remove the majority of the starter from the jar and 'discard' it (see details in post below for what to do with the 'discard'). You want to leave a small amount of the starter – around 1 tbsp – in the jar.
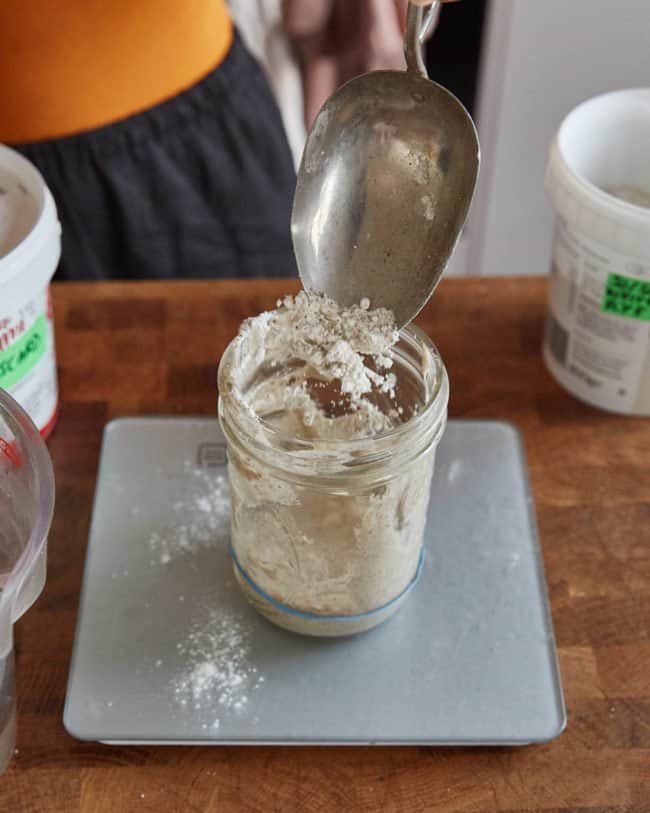
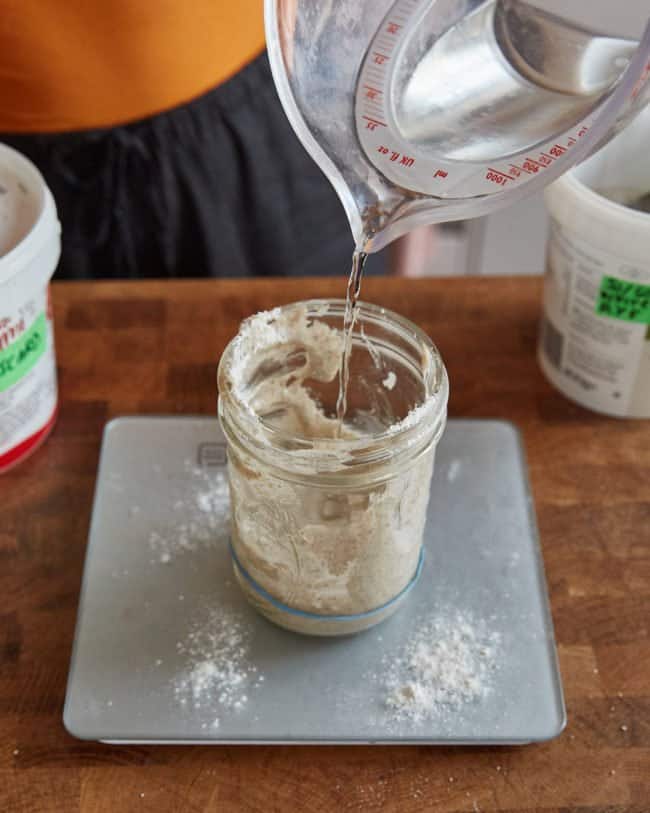
- To the jar add 40g of the flour mix and 40g of water. Stir again to combine. This is called 'feeding' or 'refreshing' the starter.40 g flour mix, 40 g water
- Cover the jar with a piece of muslin/cheesecloth/kitchen roll, secured with an elastic band (or loosely placed lid).
- You just need to repeat this 'discarding' then 'feeding' once each day – try to do it at roughly the same time of day.
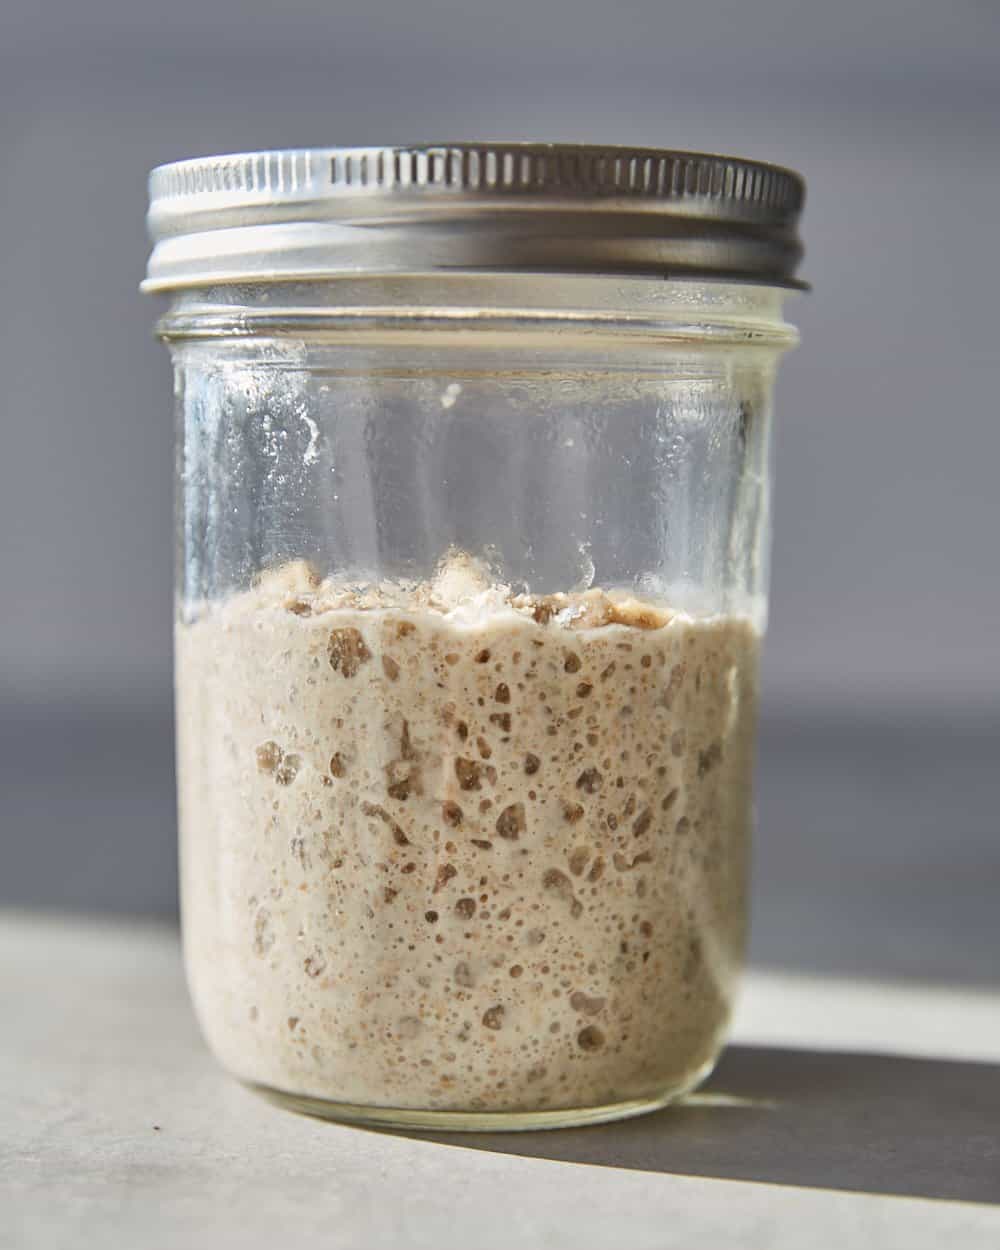
- By day 7, the starter should be bubbly and should roughly double in volume when at its 'peak' of activity – it is now ready to use! Please see the section below this recipe card called 'how do I use my sourdough starter?' to see the best tips for this.
To maintain your starter at room temperature:
- If keeping the starter at room temp, you'll need to discard and feed your starter every 12 hours. Do this in the same manner as days 2-7 (discard the majority leaving 1 tbsp behind, add 40g flour mix and 40g water, stir, cover).
To maintain your starter in the fridge:
- Discard the majority of the starter, leaving 1 tbsp behind in the jar. Feed with 40g flour mix and 40g water.
- Cover the jar with a piece of muslin/cheesecloth/kitchen roll, secured with an elastic band (or loosely placed lid) and place into the fridge for up to 1 week.
- After 1 week, remove the starter from the fridge. Discard and feed as usual.
- If you want to bake with it, keep it at room temperature, discarding and feeding with 40g flour and 40g water every 12 hours until bubbly and active (1-3 days).
- If you don't want to bake with it, return the fed starter to the fridge. You'll need to keep feeding it once a week in the same fashion until you're ready to bake with it again.
Notes
Intro to Sourdough Starter
What is the point of a sourdough starter?
Sourdough starter is a culture of lactic acid bacteria and wild yeasts which are grown on a mixture of flour & water. They digest the nutrients in the flour by fermentation, producing by-products such as lactic acid, acetic acid, alcohol and carbon dioxide. The acid produced by the microorganisms is what gives sourdough bread a characteristic tangy flavour (hence the name) and the carbon dioxide produced creates air bubbles in the bread which help it to rise.
The benefit of using a sourdough starter over a commercial dried yeast is that:
- You get a much more complex flavour from using sourdough as there are many by-products of fermentation which contribute to more layers of flavour in the finished product.
- Some people find that they can digest sourdough bread more easily than quick-ferment bread. This may be because of the slow fermentation process helping to break down components of wheat flour which some people may have trouble digesting. i.e. the bread is kind of pre-digested for you.
- It’s a fun challenge! Sourdough requires more attention as you need to feed it. It also requires more technical skill and patience as the ‘wild’ fermentation aspect is quite unpredictable and varies from kitchen to kitchen (no one’s sourdough starter is the same!).
What flour should I use for feeding my starter?
I’m a big fan of using a blend of 50% dark rye flour and 50% plain white flour for my starter. I pre-mix this and keep it in a small container so I can just scoop it directly into my starter without having to pull out two different flours every time I feed it.
The reason I prefer using a bit of wholegrain flour in my starter is that I find it produces a much more active, healthy starter in the long run. Wholegrains contain a wider variety of nutrients for the bacteria/yeast to breakdown and absorb and I think the fibre content of the wholegrains also provides more long-term energy to them as fibre takes longer to break down than starch. White flour doesn’t have much fibre in it at all so the energy gained from the breakdown of white flour is much more rapidly absorbed by the microorganisms, meaning the starter may require more frequent feeds.
Should I use filtered water for feeding my starter?
I think this is a tricky one and depends on where you live as different places have completely different water from one another. I’d recommend that as long as your tap water is safe for drinking, try it out for using your sourdough starter before moving on to other options as it may be absolutely fine.
I use plain tap water however, in London, this does contain a certain amount of chlorine and minerals which may be detrimental to your sourdough/bread. Personally I’ve never had a problem with using tap water and my starters have been fine, as has my bread. However, if you are having problems with your starter/bread not behaving normally, the water could be the problem (although there are SO many things which can contribute to a bad starter/sourdough bread).
If you’re not using water straight from the tap, you have a couple of options:
- Using tap water which has been boiled and cooled completely. This causes much of the chlorine in the water to be removed and even some of the minerals. The advantage is that this is easy to do and you don’t need extra equipment.
- Using filtered tap water e.g. using a Brita filter. This will remove many of the impurities in the water (and is what my brother swears by using). However, you need to then purchase a Brita jug & buy filters which you need to replace and either throw the old ones away (creating waste) or find a recycling point for them (extra effort).
- Using bottled water. I’m really not a fan of this option at all. I think bottled water is kind of ridiculous in places where clean tap water is available as it creates HUGE amounts of plastic waste, even if the plastic is going to be ‘recycled’ (i.e. probably will just end up in landfill). There’s also the fuel used to transport all those water bottles (water is HEAVY) to the supermarket and then to your home. If getting clean water via a tap is not an option, then obviously bottled water is your best option. But if not, I’d recommend the above options as they’re vastly less wasteful.
How long does it take to make sourdough starter?
From scratch, it’ll take about 7 days for you to get a reliably bubbly, active starter. It should actually start to bubble before this point (especially if you’re using wholegrain flours to feed it) but I’ve usually found that a week after starting it, it produces a more reliable starter to bake with. Before this point, the starter may not have an effective colony of bacteria/yeast in it to produce enough gas to make your bread rise so it is best to just wait the full 7 days to avoid disappointment.
Some people prefer to feed their new starter daily (or twice daily) for up to 3 weeks before baking with it! It depends on how your starter is acting and how keen you are to start baking with it.
If you try baking with it after 7 days of feeding and your bread doesn’t rise properly, it may mean that it needs a few more days of feeding before it’s ready to be used.
What type of container should I keep my sourdough starter in?
I think it’s best to use a glass jar for storing sourdough starter, although a clear plastic container can work too. You mainly want something which is transparent so that you can track how much your starter has risen. Glass is nice to use as it is non-reactive. Plastic should be fine but the acids produced by the microorganisms may start to degrade the plastic over time, releasing compounds into your starter which may not be ideal for the health of your starter/your health.
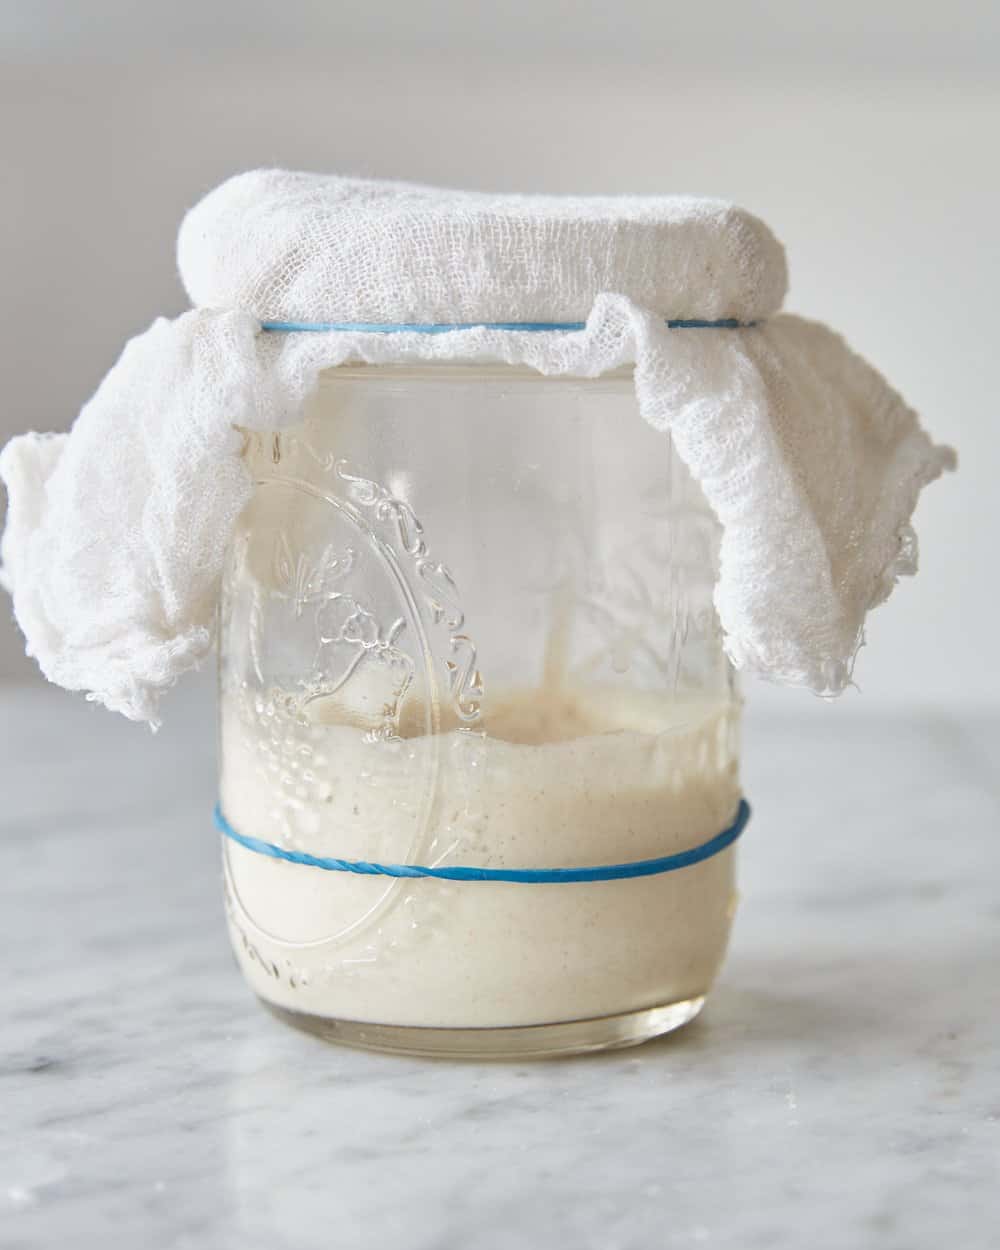
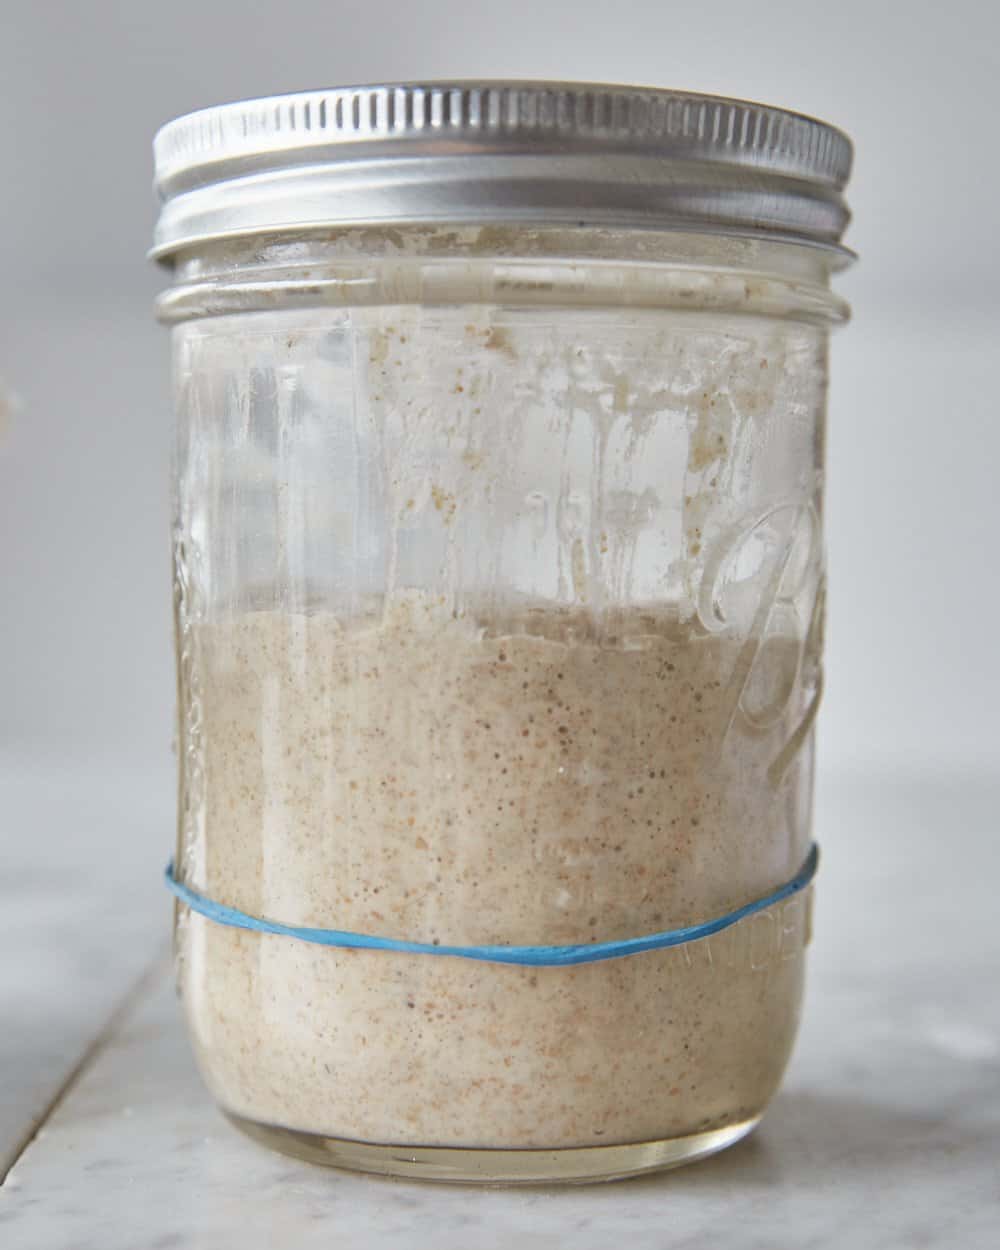
When it comes to covering your starter, you need to make sure that any lid/cover is not airtight. Sourdough starter is ‘alive’ as in, it contains live bacteria and yeasts which require oxygen in order to respire (‘breathe’) and produce the CO2 which makes the starter bubbly. This means that you should not store your starter in an airtight container!! You need to keep it in container which is covered but breathable. I think the easiest way to achieve this is to use kitchen roll or cheesecloth/muslin as a ‘lid’, secured with an elastic band as you can see in the images on this post. The other option is to loosely place the lid over the jar and not screw it in place.
The jar does need some sort of breathable covering on it, you can’t just leave it open to the elements as:
- the starter will lose moisture & begin dry out
- fruit flies/insects will be VERY attracted to your starter due to the chemicals let off during fermentation
- other bits like dust or crumbs can get into your starter.
What does 100% hydration starter mean?
In simple terms, this means that the WEIGHT of water and the WEIGHT of flour you’re mixing together are equal e.g. you’re feeding the starter with 50g water and 50g flour each time.
Please note that if you’re working in CUPS (i.e. using volumetric measurements) that the VOLUME of flour and water will be different if you’re making a 100% hydration starter! This is because water and flour have different densities. 1 cup of flour is ~120g and 1 cup of water is 240g. That means that you’ll usually use half the volume of water than you do flour e.g. feeding your starter with 1/2 cup flour and 1/4 cup water to get a 100% hydration starter. Overall I do not recommend making sourdough recipes using cups as it can really throw off the ratios of ingredients
If you’re interested in why it is denoted as ‘100%’: In professional bread/baking recipes, the quantities of ingredients are measured in relation to the quantity of flour in the recipe i.e. you use ratios of ingredients rather than set ‘weights’. The flour is always set as ‘100%’ with other ingredients then having a ‘%’ quantity which is calculated as a proportion of the flour.
Example 1: you have a recipe with 100g flour, 60g of sugar and 10g of water, the recipe would simply be: ‘flour: 100%, sugar: 60%, water 10%’.
Example 2: the recipe has 250g flour, 200g sugar and 50g of water. The recipe would be: flour: 100%, sugar: 80%, water: 20%’. This is because 200g as a percentage of 250g is 80% (calculated by: 200/250*100). And 50g as a percentage of 250g is 20% (calculated by 50/250*100).
The reason it’s done like this is because it makes it easy to scale recipes up or down as there are no ‘set’ weights, only ratios. It also makes it much easier to tweak a recipe when you’re recipe testing.
Can I buy sourdough starter?
Yes! You can now quite easily buy sourdough starter (in dried form or active) online. However, I think if you’ve got a local sourdough bakery that a nicer option is to go ask them for a small bit of their starter (bring your own container!!!). They may ask you to pay for it, which is fair, but often they’ll also be happy to give you a small amount for free. If they do give you some for free, it’s a nice idea buy something from them at the same time.
Can I eat sourdough starter?
As sourdough starter contains raw flour which is usually not processed with the idea of eating it before cooking, I wouldn’t recommend eating sourdough starter ‘raw’. You can definitely use sourdough starter to cook with in a minimal way, say by frying the plain starter in an oiled pan, like you would with crepe batter.
Sourdough Starter Maintenance
How often should I feed my starter?
The usual technique is to feed your starter roughly every 12 hours (so twice a day). If your starter is quite active, or if you’re trying to get it back to being healthy, you may want to feed the starter more often than this.
Because this is quite a lot of effort to do every day, you can slow down fermentation by placing it into the fridge. This means you’ll only have to pull it out of the fridge once a week to feed it. See section below called ‘can I store my sourdough starter in the fridge?’ for more info.
How do I make my starter more active?
If you’re finding that your starter isn’t that active, try using some wholegrain flour in your flour mix for feeding if you aren’t already doing so. I find that particularly dark rye flour is great for giving your starter a boost. You can also try leaving your starter in a warmer place as, if it’s too cold, it’ll ferment much more slowly. Another tip is to use warm water when feeding your starter.
How do I make my starter less active?
If you have a super active starter and need a bit more leeway with feeding times, you can make what is called a stiff starter. This just means that the starter has less water in it than the usual 100% hydration. A typical stiff starter will have a hydration of under 65%. The stiffer starter is a bit more forgiving when it comes to reaching its peak activity so it won’t overferment and collapse as quickly as a liquid starter will.
You can also use cold water when feeding your starter to help slow down fermentation.
Another way is to mix your starter, place into the fridge for a couple of hours then remove and leave at room temp to ferment as usual.
Can I store my sourdough starter in the fridge?
Yes, this is the preferred technique for most home bakers using sourdough as daily feedings required for keeping a starter at room temp can be impossible to maintain.
By placing your sourdough into the fridge, the cold temperature slows down the rate of multiplication & respiration of the microorganisms in the starter. The starter will ferment much more slowly meaning you only need to feed it once a week to maintain it. You can get away with leaving it for longer than this but it’ll degrade the health of your starter meaning you may have to give it multiple days of feeding at room temp before it’s ready to use for baking.
You have to be aware that keeping your sourdough starter in the fridge will mean that you will need to ‘revive’ it a bit before it’s ready for bakign with. To do this, you have to take it out of the fridge at least 1 day, before you intend to bake with it. You will need to discard/feed the starter twice daily (at room temp) for 1-3 days, until it’s bubbly and rising well.
Why do you discard sourdough starter?
After you feed your sourdough starter and it sits there, the microorganisms in the culture will feed on the starches in the flour, producing energy for multiplication and metabolism (e.g. respiration). They produce by-products – CO2, lactic acid, acetic acid and other chemicals. Eventually, they will have digested all of the starch and will start to degrade the protein in the flour. The alcohol & acid levels will rise and this, along with the fact there is no food, will cause the population of many of the microorganisms to die.
When you discard your starter, you’re removing the majority of the microorganisms from the jar, along with the by-products which can harm the microorganisms when their concentration is too high. This gives you room in the jar to add more flour & water for the remaining microorganisms to feed on once again.
In theory, you could make a sourdough starter where you never throw any of it away. However, because the population of microorganisms would continue to increase more and more, you’d have to add larger and larger quantities of flour & water each time you fed the mix, in order to give the microorganisms enough food to live on.
This would mean that eventually, you’d end up with tonnes of starter which you’d be feeding with tonnes of flour & water each day to maintain. Obviously not ideal!
So, the solution is to get rid of most of the starter, reducing the population and therefore the amount of ‘food’ you need to supply each day.
How to dry your sourdough starter for long-term storage
Once your starter is healthy, a good thing to do is to create a ‘backup’ for if your have to end up throwing your main starter away for some reason.
You can create such a backup by keeping some of the starter in the fridge as an extra or by drying out your sourdough starter. To do this, just spread a good amount of starter over a piece of baking paper (or a silicone baking tray liner) in as thin a layer as possible. Leave it to air dry until flaky and no longer moist/sticky at all. Once this is done you can flake the starter off of the baking paper into small pieces and pop into a sealed container. You can keep this at room temp if you’re sure its completely dry. Otherwise, store in the freezer for up to 4 months.
To rehydrate: tip your flakes of dried starter into a bowl on a zeroed digital scale and weigh it. Add an equal weight of water and leave to soak for an hour. Once it has rehydrated, you can stir it to make sure everything is completely combined. Let it sit for 12 hours then discard & feed as usual. You will most likely have to keep it at room temp, feeding every 12 hours, for 3-5 days until it’s back to full health.
Using sourdough starter
What is the difference between sourdough starter & levain?
Usually when making a sourdough bread recipe, you will be instructed to first make a levain/ leaven. This is commonly just a mixture of sourdough starter, flour and water which is left to ferment until bubbly before mixing into your other dough ingredients.
You might notice that a levain is made up of the same components as a sourdough starter, usually in the same or similar ratio. This is because levain is essentially just a sourdough starter but made in a specific quantity as you’ll usually need a specific weight of levain to make your loaf of bread. Sometimes a levain may have a different hydration than a sourdough starter, e.g. 75% hydration but typically I’ve seen levains which are at 100% hydration.
When a levain is 100% hydration (equal weights of flour and water), you can usually skip the step of making the levain and waiting for it to reach its peak ripeness. Instead, you can use your 100% hydration sourdough starter, as long as it’s at its peak ripeness. You can calculate how much starter you need by adding up the weights of starter, water and flour specified by the recipe.
e.g. if the recipe says to make a levain from mixing: 10g starter, 100g flour, 100g water – this uses equal weights of flour & water so you can just add up all the quantities (10+100+100=210) and use 210g of your 100% hydration starter.
Of course, this comes with some caveats. First of all, I’d only recommend replacing the levain with the ripe starter if you’re confident in what you’re doing. If you’re a beginner at making sourdough, just follow the recipe as written.
Other things to consider which would mean you’d have to make a levain would be: if the levain specifies a type of flour or different grain, has to be a hydration which is not 100% (as we’ve covered already), has to be left for a specific amount of time, or contains any ingredients other than starter + flour + water.
How do I use my sourdough starter?
- First of all, you need to have recently fed your starter. It should look bubbly and be at its peak of activity/ripeness when you’re about to bake with it. If you’re unsure about determining this, see the section just below for more detail.
- Mix your levain. Usually this is done by combining the active sourdough starter, water and flour, covering and leaving until it passes the float test.
- To make your dough, you’ll now usually combine your active levain with the rest of the ingredients for your bread dough. The exact instructions will vary depending on the recipe so just follow what it says!
I have plenty of sourdough recipes here plus you can use resources like King Arthur Flour for more sourdough recipes.
The best time for using your sourdough starter (i.e. making sure your starter is at peak activity/ripeness)
It is best to use sourdough starter when it has been recently fed and it is at its ‘peak’ of ripeness/activity. This will typically happen around 4-8 hours after you have fed your starter but could be sooner or later. The time the starter will be ready to use will depend on a variety of factors like how healthy the starter it is, the temperature of the room, the temperature of the water you’re using, the type of flour you’re feeding it with etc. In colder weather, it’ll take longer to be at its peak. In hot weather, it’ll usually reach its peak fairly quickly.
The reason for this is that when you feed your starter you’re essentially ‘diluting’ the microorganisms in the starter so you want to reach a point where the starter has been repopulated with a healthy community of microorganisms who will produce lots and lots of gas to help your bread rise. The flour and water are what these microorganisms will feed on which gives them energy to multiply and release products like carbon dioxide gas and acid. The starter is at its peak when the number of microorganisms is close to its theoretical highest level. If you leave the starter to ferment past this point, the microorganisms run out of the easy food to eat (the starches in the flour) and they start to break down the gluten instead, making the starter very liquidy & loose, which is what causes it to collapse. They also will produce excess acid and alcohol (products of fermentation). This, coupled with the lack of food, makes the starter a harsh place for the microorganisms in the starter to live. They will start to die off meaning that by the time you mix the starter into your other bread ingredients, there won’t be as many microorganisms present, meaning fermentation won’t be as good so your loaf won’t rise as well as it should.
Once you learn the rhythm of your starter, you can quite easily know when to feed it and how long it’ll take until it’s ready to use. Just be aware that changing variables (e.g. the seasons, weather, flour/water temp) can all change this fermentation time so try to keep things as consistent as you can.
The float test
The easiest way to determine if your starter is ready to bake with is to use the ‘float test’. Take a bowl full of water and gently plop a spoonful of starter into it, trying not to disturb the bubbles in the starter as you do this. If the blob floats, the starter is ready to use. If not, it either needs more time rising OR needs to be fed again.
An issue with the float test is that it may not work in all scenarios, such as if you’re using a stiff starter or if your flour is particularly coarse. This is something to be aware of as it’s not really the best way to tell when your starter is at its peak. However it is a nice way to get into understanding your starter when you’re a beginner.
Tracking the volume with an elastic band
A better way to determine if it’s ready to use is to track how much your starter is rising. You can do this by keeping an elastic band around your jar of starter. When you feed it, move the elastic band so it’s in-line with the top of the starter. When you come back a few hours later, you’ll now be able to tell how much the starter has risen. The starter should rise by 2 to 3 times the original volume when at its peak.
Once you know what the highest level your starter can reach in the jar before collapsing, you’ll be able to more easily tell when the starter is ready to bake with. This is why feeding your starter with the same amount of flour/water and keeping it in the same jar can be really useful as you’ll know exactly what level to look for!
Overripe/collapsed starter
You can tell if a starter is over-ripe by looking at it in the jar. Does it look like it reached a highest point in the jar (i.e. its peak) and then has sunk in the middle? Does it seem very liquidy and flat with small, foamy bubbles? If so, it’s probably overfermented and was left for too long. If this happens, just discard most of it and feed again as usual. Keep a close eye on it to make sure it doesn’t overferment again. An overfermented/collapsed starter will be weak as, at this point, the conditions in the starter wont be ‘supportive’ for the microorganisms to thrive in. If you use a weak starter you may risk having a dense loaf which won’t rise very much.
Underripe starter
You can tell if a starter hasn’t fermented enough yet by checking the texture. If it is still quite thick (the longer starter is left to ferment, the looser it gets) and if it hasn’t doubled or tripled in volume yet (you can use the elastic band trick to check how much it has risen since feeing). Generally, it’s better to use an underripe starter than an overripe one, but using it at its peak of activity is the goal.
What should I do with my discard?
You can of course throw the discard away (into your food waste/compost if you have one). Otherwise you can save it up in a container which you keep in the fridge and, when there is enough of it, you can bake with it! I tend to collect my discard in the fridge over a few weeks before using it to bake with.
Discard is great for using in baked goods where you do not need it for its leavening ability. Discard is pretty much just flour and water so you can replace the flour and liquid in many baking recipes with a quantity of sourdough starter.
For example, I use it in a variety of recipes like sourdough brownies, sourdough banana bread and sourdough pumpkin bread.
What flour should I use for sourdough bread?
When you’re just starting out, it’s fine to go with a supermarket brand flour – just make sure you’re using strong flour (i.e. bread flour or canadian flour) when making your bread. If you then want to get a bit more advanced, I’d recommend looking for a more speciality miller to get your bread flour as it tends to be much more freshly milled and higher quality, which will make dough which is easier to work with and a tastier loaf of bread in the end.
For the UK, my go-to is Shipton Mill – you can order their flour online and they have a fantastic variety of flours to choose from. I also like using Doves Farm speciality flours (especially their dark rye flour) which are sold in many supermarkets so is more readily available.
Troubleshooting
What should sourdough starter smell & look like?
A healthy starter should have a pleasant, yeasty aroma with a slight tang. It should not smell super vinegary or alcoholic or like nail polish remover.
In appearance, it should be a pale off-white, possibly with a bit of a grey undertone (depending on the flour you’re using) and should be bubbly.
There is grey liquid sitting on top of my starter
I’ve found this happens when I leave my starter in the fridge for too long without feeding it. The liquid on top usually smells quite boozy as it contains alcohol produced from fermentation. As long as there is no mould present, the starter should be fine to use but will require some help getting back to a healthy point.
Pour off the liquid from the top and take a small amount of starter from the jar. Place into a clean jar and feed as usual. Keep at room temperature, discarding & feeding as usual for 3-4 days until bubbly and smelling good. You may need to feed it twice a day during this period to get it back to full health again.
Why does my starter smell like acetone/nail polish remover/vinegar/alcohol?
This is from your starter sitting for too long without being fed. It’s common for this to happen when you’ve left your starter in the fridge without feeding it for an extended time. Usually it will be fine to use after feeding as usual for 3-5 days. You may need to feed it twice a day to really help it get healthy again.
Can sourdough starter go mouldy?
Yes this can happen. Usually in a healthy starter which is being fed regularly, the population of good yeasts and bacteria will colonise the starter and maintain a happy ecosystem. If you don’t feed your starter regularly enough, it will overferment and become a harsh environment for those good bacteria/yeasts to live in. Other microorganisms may find that those harsh conditions are just fine to live in and they will begin to take over the population in the starter. This can lead to mould growth or a starter which smells weird.
In the case of mould growth, the best course of action is to chuck the whole starter, clean your jar well and start it again from scratch. The other option is that if you have some discard/starter in the fridge (or some dried starter) you can use that to re-start your sourdough starter.
Why is my sourdough starter runny?
When sourdough starter is left to ferment, the microorganisms release enzymes called proteases which break down protein. These enzymes are also naturally present in flour and are ‘activated’ upon the flour being mixed with water. The proteases gradually start to break down the gluten in the flour – gluten is a collection of proteins which help with building structure in the dough. Thus, when gluten starts to break down, the ‘strength’ of the dough is diminished and it will start to become loose .


I like your recipes and advice. I live in Canada, where for 6 months it’s winter, the house is a lot colder then it is in summer and when you are letting your dough rise, especially overnight what advice would you give to keep your bowl/dough warmer or do you just have to wait longer?
Thanks, Grace. An easy way to keep the dough warmer is to place it in a switched-off oven with a mug of boiling water in the corner and the door shut. If you’re able to, replace the boiling water avery so often to keep the environment around the dough humid and warm. If that’s not an option (as you say if you’re rising it overnight), you can place the bowl on a heating blanket on the lowest setting which should keep it toasty but not too hot. The third option, as you’ve pointed out, is just to leave it for longer. I used to live in a very cold house in the north of England and found anytime I made sourdough I had to just wait a lot longer for it to do anything haha