Post updated: September 2023

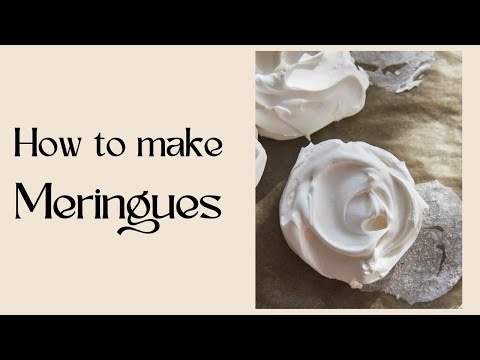
Making meringue (pronounced MER-ANG) is quite a fun thing to do – it’s great to see the egg whites balloon up as you whisk them into a glossy, opaque fluff. Here in the UK, I’ve grown up eating these mostly topped with whipped cream and berries (for mini pavlovas) or crushed and folded into cream with raspberries & strawberries for Eton mess. Whatever you’re using them for, these crispy delights are worth a try as I think the homemade versions taste so much better than shop bought.
Being so simple (just egg whites and sugar, as their base) can make them prone to fail occasionally. I’ve listed my top tips to make the best, fail-safe meringues below to prevent that from happening!
Tips for the best meringues:
Want to know the secrets for making the best meringues? I’ve listed all my favourite tips and tricks here for you!
- Separate your eggs one at a time into a small bowl. This way, if one of the yolks breaks, you don’t have to discard the whole bowl of egg whites.
- Ensure the bowl & whisk you’re using are clean and not greasy at all. Even a small amount of fat can prevent the egg whites from whipping up. It’s best to use a metal or glass bowl as these are less likely to have residual fat on them (unlike plastic which is more prone to be greasy!).
- Use caster sugar/superfine sugar. The smaller sugar crystal size means that the sugar will dissolve more easily into the meringue. You can use granulated sugar but you’ll need to whisk the mixture for a lot longer to get a smooth meringue. You can also pulse granulated sugar in a food processor or blender until broken down, to mimic caster sugar.
- Warm up your sugar. This is a tip from Helen Goh/ Ottolenghi – by warming the sugar in the oven before whisking it into the egg whites, it speeds up the process of the sugar dissolving in the egg white. It’s not 100% necessary (you’ll just need to whip a bit longer) but I like to do it as the oven is already going to be preheating for when I’m baking the meringues anyway!
- Whisk the egg whites until the mix is no longer gritty. You need to test if all the sugar has dissolved to know if the meringue is ready to bake. Take a small amount of meringue mixture and rub it between your fingertips. If it’s gritty, you need to continues whisking.
- Use a piece of baking paper as a funnel/chute to slowly drizzle in the sugar. This makes it easy to gradually pour the sugar into the egg whites. If you add the sugar all at once, it’s more likely that it’ll disrupt the egg white’s foam structure and prevent it from whipping up properly.
- Whisk at a medium speed for a longer time. Doing this creates smaller and more evenly-sized bubbles throughout the meringue which in turn makes the mix more stable. It also prevents you from over-whipping your meringue (which is quite likely if you leave the mixer on high speed!).
- Whisk until the mixture is glossy and holds its shape. This will ensure that the egg whites are full of air which will make your meringues light and foamy, not dense/sticky.
- Use an oven thermometer! They’re pretty cheap and very useful for situations where you want to know the precise temp of your oven. Unfortunately, a lot of ovens aren’t calibrated correctly so even if you set the temperature to 100C, it may be higher or lower than this. With meringue, a temperature which is too high will result in golden/brown meringues.
- Bake the meringue soon after whisking. This style of meringue is not very stable and the whipped structure will start to break down and weep if left to sit for too long.
- Higher temperature to start, then low and slow. By starting the oven off at a higher temperature we make sure the meringues form a nice crust. The oven temp will drop when you open the door to put the meringues in there so this higher temperature helps to mitigate some of that heat loss. We then turn the heat down lower and bake for an hour. This ensures that they stay bright white and get crispy and dry throughout.
- Leave the meringues in a turned off oven to cool. Letting the meringues sit in the oven for another 2-3 hours post-bake allows them to slowly cool down and dry out even further.
- For best results, bake on a dry day. If the air is very humid when baking meringues, it’s going to take longer for them to dry out. They’re also more at risk of losing their crispy texture post-bake as the sugar in the meringue will attract the water from the air. If you can’t avoid this, make sure you let the meringues cool fully then store in an airtight container. You can even put a sealed packet of food-safe silica gel into the container too which will help keep them dry (just keep this way from children/pets and obviously do not consume the silica gel!).

Ingredients
- 125 g (1/2 cup) caster sugar (superfine sugar) see notes for if you only have granulated
- 75 g (1/3 cup) egg whites (around 2 egg whites) see info in post above if you have more/less egg white than this
Optional inclusions
- ⅛ tsp cream of tartar OR 1/2 tsp white wine vinegar/apple cider vinegar/lemon juice/distilled vinegar optional
- 1 small pinch fine salt optional
Instructions
- Preheat the oven to 150°C fan (170°C non-fan). Line a baking tray with baking paper.
- Spread the sugar out on the lined baking tray and place into the oven for 5-7 minutes. This warms the sugar up which will help it dissolve into the egg white more easily. It's an optional step but IMO is worth it for the best meringues!125 g (1/2 cup) caster sugar (superfine sugar)
- Place the egg whites into a clean bowl of a stand mixer fitted with a whisk attachment – you want to make sure there's no grease/fat in the bowl as this can prevent the egg whites from whipping. Don't turn it on just yet75 g (1/3 cup) egg whites (around 2 egg whites)
- Once the sugar is hot, turn the oven down to 110°C fan (120°C non-fan) and start the stand mixer on a medium speed (around speed '6' on a KitchenAid).
- Once the egg whites start to look frothy and form soft peaks, add the cream of tartar/ vinegar and salt (if using) then mix for 1 minute.125 g (1/2 cup) caster sugar (superfine sugar), 1/8 tsp cream of tartar OR 1/2 tsp white wine vinegar/apple cider vinegar/lemon juice/distilled vinegar, 1 small pinch fine salt
- Gradually pour in the warm sugar (you can use the baking paper as a funnel to slowly 'drizzle' the sugar into the bowl) – it should take around 3 minutes for you to add it all.
- Continue whisking at the same speed until the meringue is cool – around 5-7 minutes. At this point, the meringue should look thick, opaque and glossy. It should hold stiff peaks. If you rub some of the mix between your fingertips it should feel completely smooth – if it feels gritty at all you'll need to keep whisking until it's smooth.
- Dot a bit of meringue mixture into the four corners of a baking tray and line with a piece of baking paper (you can re-use the baking paper from the sugar). Doing this helps the baking paper stick to the tray so it doesn't flap around in the oven.
- Take a large heaping tablespoonful of meringue and dollop onto the tray. Space each dollop a few centimetres apart as the meringues will puff up quite a bit as they bake. You should get 6 medium meringues.
- Bake the meringues for 7 minutes at the current temperature of 110°C fan (120°C non-fan).
- Now turn the oven down to 90°C fan (100°C non-fan) and bake for a further 40 minutes.
- Turn the oven off but leave the tray of meringues inside. Allow to cool in here for 2-3 hours – the remnant heat of the oven will make sure that the meringues cool down very slowly, helping them to dry out a bit more, which will make them extra crisp on the outside. The meringues are ready when they easily peel away from the baking paper.
Video
Notes
Nutrition
Don’t have 75g of egg white? Here’s how to make meringues with any quantity of egg whites using a ratio
The weight of egg whites can vary quite a bit depending on the size of your eggs. It’s best to work with ratios of ingredients by weight, rather than by number of eggs as it’s more accurate, leaving less room for error. This can be annoying if you don’t have 75g of egg white as I’ve specified below. The best way to figure out how much sugar you need in relation to your egg whites is a simple bit of maths.
For meringue, the ratio of egg white to sugar is 0.6 to 1
If you remember this ratio, you’ll be able to make meringues with any quantity of egg white without having to look at a recipe!
So, to calculate the weight of sugar needed, just take your weight of egg white and divide by 6 then multiply by 10.
Example calculation:
Say I have 60g egg white.
I’m going to divide by six: 60 ÷ 6 = 10
Then multiply by 10: 10 x 10 = 100
Which means for 60g egg white, I need 100g sugar.
If you don’t want to do the maths…
Whether you need a meringue with 3 egg whites or 5 egg whites, I’ve popped a table below with the quantities already calculated for you
| Quantity of egg white | Quantity of Sugar | Quantity of acid |
| 37g (around 1 egg white) | 62g | pinch of cream of tartar (or 1/4 tsp vinegar) |
| 75g (around 2 egg whites) | 125g | 1/8 tsp cream of tartar (or 1/2 tsp vinegar) |
| 112g (around 3 egg whites) | 187g | 1/8 tsp + a pinch cream of tartar (or 3/4 tsp vinegar) |
| 150g (around 4 egg whites) | 250g | 1/4 tsp cream of tartar (or 1 tsp vinegar) |
| 187g (around 5 egg whites) | 312g | 1/4 tsp + a pinch cream of tartar (or 1 1/4 tsp vinegar) |
Flavour variations
Chocolate chip
Finely chop 50g of dark chocolate (I like a 70% cocoa or higher as the meringue is very sweet). Fold this into the meringue once it has reached the glossy, stiff stage.
Orange or Lemon
Fold the finely grated zest of 1 orange or 1 lemon into the meringue once it has reached the glossy, stiff stage.
Strawberry meringues
Crush 50g dehydrated strawberries into a fine powder. Swirl into the meringue once it has reached the glossy, stiff stage – only mix it in a little as you want to maintain streaks of colour.
Coffee meringues
Crush 1 tsp instant coffee granules with a bit of the sugar in a pestle and mortar before incorporating into the egg whites as they’re whisking.
Almond meringues
Fold 50g toasted, flaked almonds and 1/8 tsp almond extract into the meringue once it has reached the glossy, stiff stage.
Ingredients for meringues
- Caster sugar / superfine sugar: the sugar is important to stabilise the egg whites which helps the foam hold its shape. It makes the meringues crispy, once baked, and of course also provides sweetness.
- Egg whites: the proteins in the egg whites unravel when whisked, forming chains and trapping air bubbles which is how they produce a foam. The proteins coagulate in the oven, producing a firm structure. Egg whites contain mostly water though which is why the long baking time is necessary to dry out all that liquid.
- Cream of tartar or vinegar (optional): these are acidic ingredients which lower the pH of the mix, helping to produce an environment where the egg white foam is more stable.
- Cornflour (optional): as far as I understand it, this helps to stabilise the foam too. I think the starch also absorbs water (egg whites are full of water) which gelatinises in the oven and binds water in meringue, making it softer/marshmallowy in the middle.
How to make meringues – step-by-step images:
1. Separate the eggs. It’s best to do this one egg at a time into a small bowl before adding each egg white to the bowl of a stand mixer (or your large mixing bowl). This way, if one yolk breaks, it’ll only ruin one egg white.

2. Spread sugar out on a lined baking tray then warm the sugar in the oven. This encourages it to dissolve into the egg whites more easily, making a more stable foam.

3. Whisk the egg whites to a soft peak foam. We whisk only the egg whites first, which makes them start to form air bubbles and foam up.

4. Add the cream of tartar or vinegar, if using, and whisk for 1 minute to combine.

5. Slowly add the sugar. This creates a stable foam, stops it collapsing/overwhisking and ensures the sugar is properly dissolved.

6. Whisk on a medium speed until stiff, glossy and opaque. At this point, the meringue can’t hold more air. The sugar should have completely dissolved into the mix.

7. Line the tray. Use dots of meringue in each corner of the baking tray to help the baking paper stick to the tray.

8. Shape. Spoonfuls of meringue are dolloped onto the tray and shaped as you like.

9. Bake. The meringues baked low and slow to dry them out.

10. Leave to sit in the oven. Letting them sit in the oven for a further 2 hours dehydrates them, making them super crispy.
Different types of meringue
In patisserie, there are 3 types of meringue:
French meringue
The least stable. This is what is typically used for meringue nests, cookies or kisses.
The egg whites and sugar are whisked together at room temp until thick and glossy. The mixture must be baked as if it is left raw, the structure will start to break down. Baking it also makes the meringue safe to eat.
Swiss meringue
More stable than French. Typically used for Swiss meringue buttercream like in this Vertical Layer Carrot Cake. It’s also a good one to use for the topping of a lemon meringue pie.
The egg whites and sugar are stirred together in a heatproof bowl set over a pan of simmering water (bain-marie) until they reach 71°C and the sugar has fully dissolved. This is then whisked until the mixture is completely cool. As it has been ‘cooked’ over a water bath, it’s safe to eat and doesn’t have to be baked.
Italian meringue
The most stable. Similar to Swiss meringue, you can use this for buttercreams, frostings or pie toppings.
The sugar is combined with water and heated to 116°C to make a hot syrup. This is then poured into the egg whites while whisking until fully combined and cool. The heat ‘cooks’ the egg whites so the meringue is safe to eat without having to bake it.
What oven temp for meringue?
To keep meringues a bright white colour, you need to bake them at a low oven temperature. Usually this is around 95°C (200°F) but can range from 90° to 120°C depending on your oven (if it’s fan assisted or not). It’s also important to leave the meringues in the oven turned OFF after baking for at least 2 hours to allow them to fully dehydrate, making them nicely crispy.
How long should I bake meringue?
This definitely varies depending on the size of your meringues with larger meringues needing longer. If you’re doing meringue nests or kisses, you’ll need around 50 minutes of baking time, plus 2-3 hours for them to cool & dry out in the oven.
Why is my meringue not stiffening?
If your meringue mixture is too runny, there could be a few things going wrong.
- There was egg yolk in your egg whites. This can happen when separating the eggs if the shell pierces the yolk and some seeps out. The fat in the yolk prevents the egg white from whipping up.
- The bowl or whisk is greasy. Similar to the egg yolk issue, any fat which accidentally gets mixed into the egg whites can prevent them whisking up.
- Sugar added too late. If you let the egg whites whisk for too long before adding the sugar, the sugar may actually hinder the egg whites from whisking up properly. This is down to the sugar pulling water from the egg whites.
- Sugar added too quickly. If you add the sugar all at once, or in large amounts, it doesn’t get dissolved into the egg whites properly and may start to disrupt the egg white protein network.
- Mixture overwhisked. If you have the speed of your mixer on HIGH, this is more likely to happen which is why it’s best to whisk on a medium speed. If overwhipped, the egg white structure will start to break down (it’s not a very stable foam) and you’ll see liquid at the bottom of the bowl under the meringue.
- Meringue left to sit for too long before baking. As the foam isn’t very stable, the mixture needs to be baked swiftly after mixing it up.
Is meringue gluten free?
In the majority of cases, yes! Meringue is simply sugar and egg white so it should be gluten free. Just be aware that, since it’s recommended to add vinegar to meringue recipes, that some people may use malt vinegar which is NOT gluten free. Most of the time, a more neutral vinegar is used but if you’re unsure, as the person who made it (or check the back of the pack, if you’re buying them).
Is meringue vegetarian?
Yes, as meringue contains no meat it is considered vegetarian friendly. It does contain egg whites which are an animal product but most vegetarians eat eggs. However, the inclusion of egg whites means that meringue is not vegan.
To make vegan meringues you can use the water from a can of chickpeas (i.e. aquafaba) as an egg substitute in place of the egg whites.
How long do meringues last?
Due to the high proportion of sugar, and low levels of moisture, meringues are extremely shelf stable. They should last in an airtight container at room temperature for at least 2 weeks, if not more. If they’re starting to soften up, you can put them back into a 95°C oven for 10 minutes then switch the oven off and let them sit in there for an hour to dry out again.
Can you make meringue without cream of tartar or vinegar?
Yes. The vinegar or cream of tartar are acidic ingredients which help to strengthen the egg white foam network, making the meringues more stable. You can leave it out if you don’t have any – the meringue will still work, it’ll just be even more important to follow the tips to ensure your meringue is as stable as possible without it.
Can you make meringue without cornflour?
Yes. The cornflour, like the vinegar, helps to stabilise the meringue and leads to a softer, more marshmallowy texture in the centre due to it binding water and holding it in the meringue. There’s no essential need for it, especially if you prefer a crisper meringue!
Can you make meringue with icing sugar?
Icing sugar (or powdered sugar) isn’t the best option when making meringues. It usually contains a small amount of starch as an anti-caking agent which prevents the sugar clumping. This can throw off the interaction between the egg whites and sugar as different brands of icing sugar will contain different amounts/types of anti-caking agent. It’s best to use a plain white sugar like caster or granulated. However, if you’re in a pinch and all you have is icing sugar, you can try it out. It’s a bit of an unpredictable thing to use but it can work out just fine (especially if you’re following all the tips I’ve given at the top of this post). The only thing I would advise against with the icing sugar is to not pre-warm it in the oven before mixing into the egg whites as it’s more likely to start melting/burning in the oven.
How to make meringue nests?
You can use the same mixture as in the recipe above. To make the nests, you’ll need to dollop a large, heaped spoonful of meringue onto the lined baking tray then use a spoon to make a well in the middle of the meringue. Alternatively you can transfer the meringue mixture to a piping bag and pipe a nest shape, making sure to build up the sides so that you end up with tall sides and a well in the centre.
Why does my meringue weep?
This can happen from a variety of issues. A main fault can be overwhipping the egg whites – this can happen if you have the mixer on a high speed. It’s best to use a medium-low speed to ensure the meringue is stable and that it doesn’t overwhip.
It may also occur from underwhipping the meringue which means the sugar hasn’t properly dissolved in the egg whites. When this happens the undissolved sugar in the structure can start to attract water (sugar LOVES water), causing the weeping.
If you underbake the meringues, they may have remnant moisture in them which can in turn start to dissolve the meringue and cause it to weep.
Lastly, if you don’t store the meringues in an airtight container, especially if the air is humid, they can draw moisture from the atmosphere can become soft & weepy.
Why are my meringues sticky?
The main culprit here is underbaking. You really do need to leave them in the oven to cool down as this helps drive out as much moisture as possible, making them dry and crisp.
The recipe has the oven at 150C for warming the sugar, before reducing to 110C. But then you say to initially cook the meringues at the “current” temperature of 150C. A little confusing… 🙂
Hi Pete! Thanks for catching that typo, meant to be current temp of 110C, sorry!
Hi, I’ve tried many meringue recipes over the years and this is by far tge best! Thank you! I didn’t see mention of eggs at room temperature, however.
I balked at warming up the granulated sugar, but it worked beautifully!
thank you… very good